Tuesday, February 11, 2014

Tiles

Some time ago I started working on a tile project. I was inspired by a visit to the Moravian Pottery and Tile Works in Doylestown, PA a few years ago and decided to teach myself a process for making different types of tiles. I blogged about it in December 2010 and January 2011 - four posts in all.

At the time, I was working on tiles with a mosaic look. I am still working on that idea, but it has been modified. The tiles are now taking the form of three-dimensional sculptural pieces. The metamorphosis was sudden, following as it did, a visit to the now closed Higgins Armory Museum in Worcester, MA. There I saw a collection of armor and arms that was quite impressive. But more importantly, I saw heraldic animals and crests that gave me new ideas. I stopped in at the museum's gift shop and found several books of designs including mythological animals found in architecture the world over. One appealed to me and I started working on it.
I modified this and started a rough cut. It became clear that I would need a combination of addition and subtraction to make this creature come alive. Here is the first rough cut:
Like a quilter, I quickly figured out that there was too much detail for this to work, and I also needed finer tools for the detail I would keep. I ordered a set of dentist's tools and kept at it. :After carving and adding clay, the tile looked like this:
The feet...yeah, I know. The idea was to start big and carve them out. They went on and came off several times before I figured out that the whole creature was pretty goofy, so goofy feet wouldn't really matter that much. A little while after I drew that conclusion, I also decided that carving the feet wasn't going to work and I started sculpting them instead. That resulted in:
Snowshoes! Well, this was a learning curve, and at least I was moving forward. With a little more perseverance, I managed a pair of acceptable feet:
Then the process of casting a mold could begin. Plaster is not a medium I have a lot of trouble with, so this was pretty easy. Of course, it did mean destroying the original because I cast with a moist clay original. It has everything to do with the way clay shrinks and my lack of desire to do the appropriate math. But once you have a single mold that works, you can cast as many originals and make as many more molds as you wish. Here is the result of my first casting in the new mold:
Note the bits of plaster around the edges. The border was a bit off as well. More castings needed to be made before I got some good, clean tiles. Once I had them, I was free to make more molds!
These five are currently drying over a heating vent and should be ready to go into production in about one week. Then there will be tiles! In time, I will use a press to make these (for now, I'm using a rolling pin). The process of getting a press made that will do this has also been one of discovery, I started with a homemade one-armed bandit that had no mechanical advantage and was impossible to operate without hanging from it like a crazed monkey:
I'm no engineer as this picture illustrates (although I must say I was pretty proud of my work here). From this humble beginning, I looked to make improvements. Books were read, websites were Googled, lots of research was conducted. And finally, I found this great idea:
It's a 12-ton shop press that I will be modifying into a tile press. There will still be a learning curve. I'll have to figure out how much pressure to apply to make a tile in a press mold without turning the plaster mold into dust. I probably better make more molds...


Friday, September 27, 2013

Celedon

In an earlier post, I mentioned that I was working on a faux celadon glaze. Celadon glazes can be traced back many centuries to Korea and China and are still very popular today. I call this a "faux" celadon because traditional celadons are made by firing at very high temperatures in reduction atmospheres. Since I don't fire at high temperatures and use an oxidizing atmosphere, the closest I can come is through appearance.

Some may say this doesn't look at all like a traditional celadon, but the color of the real thing actually varies from a very light green to a gray color. So I didn't feel the need to duplicate anything too closely.

This vase also represents a new foray into products that are exclusively Lowell Hill Pottery and not Rowantrees reproductions. While my dedication to that great tradition hasn't wavered, it's nice to travel off in different directions and see what I can think up on my own. The design was created through a process called water etching. The design is painted on a dry pot using wax resist. Once the wax is dried, the pot is blasted with water using an air gun (which I normally use for glazing). Areas coated with wax will resist the spray while areas of bare clay will etch away leaving the raised design.

This represents a work in progress and was one of the first vases of this type to emerge from a firing. I already know what I need to do to improve this and take it to the next level, and I'm going to test that theory in the next kiln. Stay tuned!

News from the Hill (Lowell Hill, that is)

It's not always easy coming up with something to blog about. Either events are moving too quickly to stop and take stock or nothing at all seems to be happening. Either way, there you are with either too little to say or no time to say it.

Summer has come and gone. Wow. That was fast! Right now, I am all about throwing as much pottery as I can. Soon I will be all about glazing all that pottery I threw. Then... ah yes.

There have been some subtle adjustments to fate here on the hill. While my plans to build a new studio space are still coalescing, the circumstances in which I find myself have changed just a bit.
For starters, the house tenants have moved out. They were the driving force behind my need to leave and while I take nothing for granted, it would seem as though any deadline to be out of the building probably went with them. The owner of the building has again affirmed that she likes having me there continuing the Rowantrees tradition, so that would seem to indicate that at the least I do not have to panic about clearing out of the place.

Mind you, that puts nothing on hold as far as my new studio. There are still plenty of reasons to keep moving forward with those plans. The old building is barely standing and trying very hard to fall down in places. There is still no heat in the winter, making it necessary to stop production at a time when production is most feasible. The fact remains; if I want Lowell Hill Pottery and the Rowantrees Tradition to continue - much less to flourish - I have to be able to work all year long at it.

So what do I have planned for the coming months? Well, production stands out as the first and most important item on the list. I am throwing, glazing and firing as much as I can and as fast as I can to increase inventory. At the same time, I am meeting with a contractor to finalize plans for the new studio. The Kickstarter video will soon be ready to go and then the fund raising project will go live.

Then we will see!

Sunday, July 14, 2013

Petal Cups: The Final Product!

This picture represents the first batch of finished petal cups. I now have them in all colors except Evergreen (which is next!).
PC1
This has been a great adventure and I'm glad to have this trove to show for it. Other great developments of the year so far include a new Ducks Head glaze that is more beautiful than ever, and designs for one-of-a-kind vases for my KickStarter project.
With all of this going on, I have arrived at a design for a holiday ornament that will go into production soon. I have also begun work on a new glaze that will be exclusive to Lowell Hill Pottery and that will look like an ancient celadon glaze. It can't be an actual celadon because that is created by firing a glaze containing iron at temperatures I don't reach and in a kiln atmosphere I don't use. Rowantrees once had a glaze they called celadon that was a good imitation of the original, but I'm going for something distinctive to Lowell Hill Pottery. I have a vision, but I'll have to see it in front of me before I know I have it. The first set of tests will go into the next glaze kiln this week. Exciting!

Friday, April 19, 2013

The Petal Cups of Spring

This has been a busy winter! In my last post on the petal cups, I said that I would spend the winter producing them. At some point, I set a goal of 1000, and while I had no illusions of achieving that goal in a single season, I have made an impressive start! I have also made a great deal of progress on the technique of forming them. Compare this picture to the one in the last post on the subject and you will see a big difference! I threw most of those early efforts out.

I estimate that I am almost halfway to the 1,000 goal. In fact, the kiln is almost full and ready for the first bisque firing. The cups in this picture will be the last to get stacked before I close the lid.

As I mentioned before, the method for making the petal cups was not passed along, and those who were around at the time are either gone now or do not remember clearly how they were made. Petal cups have not been made in almost 40 years as far as I can tell, so I had to figure some things out. Here is what I came up with.

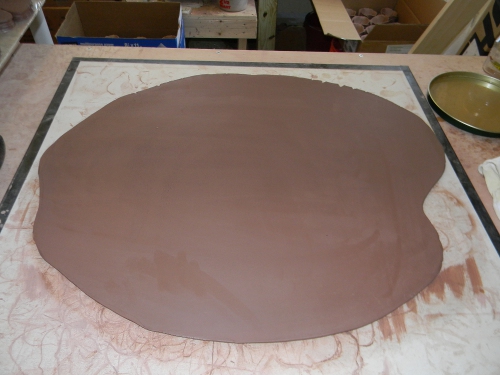
It all starts with a slab of clay. I am a wheel potter for the most part, and I don't have a slab roller, so I learned the art of wielding a rolling pin. Mind you, this particular rolling pin is 30 inches long and made for the purpose, so that helped.

But no matter how good the roller is, a nice, even slab is no small matter! I estimate that it takes me the better part of 15 minutes to get a slab rolled out to the correct thickness. There are all sorts of things you have to watch out for: Evenness of thickness, direction of the rolling action (it has to be changed several times), turning the slab over every few strokes (done by layering the slab between two sheets of canvas), and the dynamics of drying just to name a few. Fail in any of these, and the slab will yield unpredictable, often poor results.

Once the slab is made, it needs to rest and dry out for about a half hour before it can be worked. I stack the slabs between sheets of drywall for this purpose. The clay has to be stiff but plastic enough to bend and shape without cracking or breaking. The reason for stacking with drywall is to make sure that the top of the slab doesn't dry out any faster than the underside. If it does, the slab will warp - as will anything made from it.
I use a rose petal cutter for making what I call "blanks." Of course, nobody makes a rose petal cutter this big, so I had one made for me by the folks at Aunt Holly's right here in Maine (I love doing business locally). The cutter works beautifully with a little help from Murphy's Oil Soap, which I use as a releasing agent to keep the cutter from sticking.

I can usually get about 10 blanks from one slab, and with six slabs per run, well, you can do that math. Not all slabs fair as well. The slab in this picture only yielded eight.

Once the blanks are cut out, they are stacked and the stacks are wrapped in plastic to keep them from
drying out any further. Now the fun can begin!

I use a jig that I made for the purpose. It consists of a PVC floor drain turned upside down, a length of PVC pipe and a fitting into which I have glued an upside down wooden egg with the end cut off. Hard to picture?

The blanks are sponged to remove the pattern left on them by the canvas during the rolling out process. The edges are smoothed and rounded, and the maker's marks are put on the bottom. Then the blank is draped over the jig and the petals folded into place. The finished petal cup is allowed to dry at least one day and then is sponged again to smooth out any finger marks, rough edges and imperfections. Then they are allowed to dry for several days before stacking in the kiln. Because they are quite thin it doesn't take any longer than that.

In my first bisque firing of this year, I stacked only the petal cups. Not one was lost in the first firing, which is a great sign. In all, I ended up with 390 of them. Gad! Just short of an even 400. I need to get busy!

On Facebook recently, I stated that my production goal on petal cups is 1,000 this year. I just might reach it. But the tile project is calling my name once again, and I have already started on designs for holiday ornaments. You can't start too soon!

Monday, April 15, 2013

A New Home: Plans for the New Pottery Studio


Location for the new pottery studio


I have finally staked out the position for my new pottery studio. At least, I have staked out its theoretical position. There are still so many hoops to jump through...finding a contractor, finalizing the design, getting permits and - oh yes - figuring out how to pay for the thing!
The field in this picture is right next to my house on Front Ridge Road in Penobscot, Maine. It's not as big as it may seem. In fact, those four stakes encompass pretty much the entire area available to me under zoning and setback rules for my town - at least for commercial buildings like this. The front stake is 55 feet from the edge of the road and the area measures 24 by 48 feet. Really, that's not a terribly large building - particularly for a pottery - but I've seen a lot of pots emerging from smaller spaces. And since I reconsidered and put the gambrel roof back in, I'll have more overflow storage.
Designing a pottery studio turned out to be something of a fraught process. Deciding where to locate equipment and supplies meant designing for an efficient work flow. It's interesting how ideas and resources will suddenly pop up when you need them. An article in Ceramics Monthly magazine had a lot of good advice.

 Work Flow in a Pottery

Studio
This is the latest - and probably final - version of the pottery studio. If you have read previous posts on this, you will see that things have changed a great deal. There is more square footage and equipment has been shifted about.
The most important change is the attention to work flow. Ideally, pottery should go from wet clay to a finished pot in a single circular path around the studio. The more "back and forth" motion, the more expensive your production process. My earliest plans called for a full basement, the idea being that I would make pots in the cellar and sell them on the first floor.
Nice idea, but even at 54 years of age, I have determined that the less time I spend lugging clay around, the better. Somehow, carrying a ton of clay one 50-pound box at a time down the cellar stairs at least once each year didn't sit well. So, a concrete slab it is. With this design, clay is stored right by the door and only backs up once in the greenware area. From there, it makes a single clockwise circuit around the studio and comes to rest in the show area. The pattern looks something like this:
Pottery Arrow
Note that the kilns are in the center of all this activity. I fire twice in my process, to that seemed to make sense. Besides, I have engineered this building for energy efficiency, and it seemed logical to put what may amount to a secondary heating system in the center of things. It also does away with the clumsy issue of having to install them at least 2 feet away from flammable surfaces.
Is this a good place to mention that the lumber company added in a second door on the back wall for safety purposes when they estimated the materials cost?
Ah, yes. Materials cost. Well, that was a bit of a surprise. It came in at just about $35,000, which was a good deal less than I thought it would be. Given that I want this place to be as energy efficient as possible, the insulation alone was a large chunk of that total, so there is a little wiggle room. But not a lot.
Of course, that price does not include the concrete pad, heating, plumbing or electricity. Nor does it include labor. So I expect that cost to do some multiplying, which brings me to the final issue:

When Worlds Collide: The Dream Meets Reality

I will be meeting with a prospective contractor in a few days to go over this. It doesn't take much to run up a big bill, and I expect all those items not included in the materials estimate will at least triple the cost - if not quadruple it. I won't know until I ask, though. I want in-floor radiant heat and I need three-phase power unless I want to replace most of my current equipment, which I suspect would cost even more.
Here's the plan: figure out how much this will actually cost, then mount a KickStarter campaign to raise as much of it as I have to. The rest will be a matter of personal finance. It's a big, ambitious idea and nothing is certain - except my determination to keep this wonderful heritage alive whatever it takes.
So please, do sign up for my newsletter if you haven't already. And check back frequently to see how things are progressing! And buying pottery is a good thing as well! And while you are doing all of this, have a great Spring!

Sunday, December 9, 2012

A New Home for Lowell Hill Pottery?

That is the question. This has certainly been an eventful year for Lowell Hill Pottery. It looks as though this year will end in the black - a first and not at all bad for the third year of a five year start-up. If that happens, it won't be due to a lack of challenges.

First there was the scrap metal fiasco that lost me the pug mill, then the fuel oil leak (resulting from said fiasco) that had us all in a panic (but amounted to naught). Then Sheila Varnum passed away - perhaps the most traumatic of all the events.

The legendary brick path was closed to pottery traffic for the first time in 80 years - not an unreasonable thing since the house would be inhabited by new tenants. Most of the summer was taken up with renovation to the house. And make no mistake about it, the house is absolutely beautiful as a result.

The new tenants weren't so sure about living in a space that was also occupied by a working business. A few panicked phone calls and about three days of very nervous waiting resulted in a compromise whereby Lowell Hill Pottery could remain in the building for one more season, but had to move after that.

So there it is. 2013 will be my final year at the old Rowantrees building.

It's not a bad thing, really. The building is well over 150 years old and showing every day of that age. There is so much rot in the walls that you can scoop it out with your bare hands. Window panes have started falling out of their frames. Of course, there is no heat. There hasn't been since 2008.

Add to that the lead contamination - some from the Rowantrees years but most from the fact that the buildings are old enough to have been painted with lead paint many times over.

Yeah, it's time to go. I would have preferred to wait at least one more year, but for one other small detail: I really need to be able to work year round on pottery. Having only five months out of each year to do the work is not compatible with increasing business volume or turning this pottery into the business I want it to be.

So the planning is now well under way. I have drawn up a plan for a modest studio space to go in the field by my house. I have spoken with a contractor and will soon start the agonizing process of figuring out how to pay for this. Here is a sketch of the floor plan and a picture of how it will look:


The dimensions are 24 by 36 feet and it will be on a simple concrete slab. I had hoped for a walk-in cellar space for the studio with one floor above for the stockroom and sales area, but I learned a hard lesson about what it costs to build from scratch.

At first, I thought about a 24 by 48 with a walk-in cellar and upstairs with a full bath, office and closet space. Thinking that was going to cost too much, I drafted a second plan that reduced the floor space to 24 by 32. Well, that smaller plan got estimated at $182,000. No way.

The illustrated plan above is not much larger than a generous two-car garage and is currently estimated at $67,000. That's still pretty steep, but I do want to do this right. That means energy efficiency and good choices in building materials. I have good people ready to help.

So now it's about the money. I am preparing to launch a project at Kickstarter.com. If you have never heard of it, Kickstarter is a web-based funding platform for creative projects. People like me who have a need for funding can put up a project and others willing to help can pledge support. There are premiums for those pledges as well. It's a lot like the pledge drives you see and hear on public broadcasting - but without the interruptions.

I will be posting updates on the studio project here, on my Facebook page, and on the Lowell Hill Pottery website. In the meantime, the most important thing I can do is build interest and community around this. Please help me spread the word about the Lowell Hill Pottery studio project so that when it is launched, there will be interested people ready to have a look.

The Rowantrees heritage and tradition deserves to survive.